This post contains a gifted item
If you can start eating a plate of food without documenting it first, I applaud you. I have long given up the hope of ever eating a hot meal. So why do we do it? Food is first and foremost functional. We need it for nutritional purposes and to, well, survive. However sometimes a pretty plate of food is worth documenting. That one photo can serve as a reminder of a special event, a perfect date or a memorable holiday. We share snaps of our baking successes and on some occasions, our food is so aesthetically pleasing, it's bordering on art and worth being immortalised in a photograph.
Taking a truly special food picture is an art. I see professional food bloggers with all the right kit, regularly invited to the swankiest joints, sharing dark, out of focus food pictures where the colour levels are all wrong. Then comparatively I see influencers with smaller follower counts - or your average Joe - who use a mobile phone and get it spot on. My point being that taking a great photo is well within your reach and easily achievable with just a few small pointers.
Frame your shot
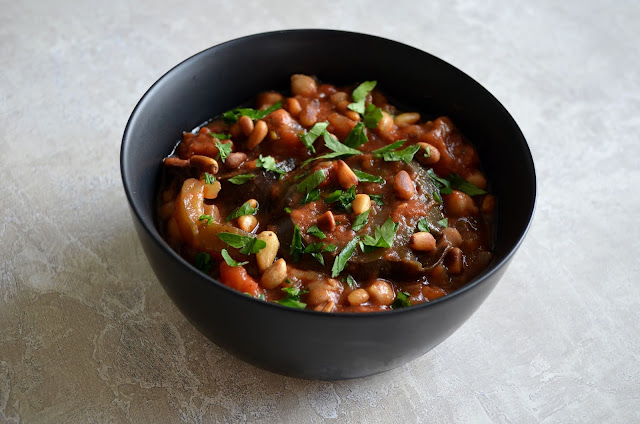
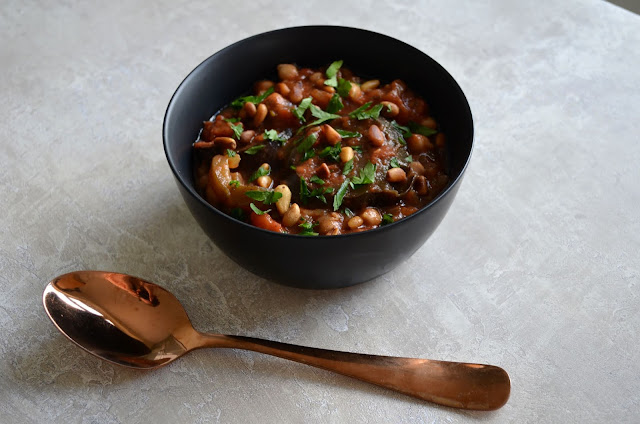
It's all about the background. Whilst we are not all blessed to have marble worktops, the key is having a work surface with colour variation or a bit of texture to add interest. A concrete look surface always works well with food photography and can add an industrial feel. Or for a more luxe look, opt for a marble effect surface paired with gold utensils. To get a high end look surface for a fraction of the price, try backdrops like these which are perfect for food photography. My simple vegan aubergine and chickpea stew looked a whole lot more exciting when I tried it against the different backgrounds.
 |
| Vegan aubergine and chickpea stew |
For a fully authentic magazine style food shot, frame your dish with crumbs, a smattering of herbs or a lovingly torn French baguette. But don't overdo it. You want the shot to look homely, not messy (and not excessively staged!)
Get the lighting right
Natural light always works best, but at this time of year, good light can be hard to come by which is where you may need assistance in the form of a lighting kit. Circle lights can help in the winter months but beware, as artifical light is no match for natural light and can cause glare and over-saturated images. To help control the lighting your photo receives - whether natural or artifical - consider using a reflector and diffuser like this 5 in 1 one here to eliminate shadows and glare.
Edit with caution
Sometimes the perfect photograph requires some editing work, especially if you are not blessed with natural light. Increasing the contrast levels can add richness to your image, and low light can be remedied. Edit with caution though, as many professional food bloggers make the mistake of over-saturating their images, leading to the colour of natural food products appearing, well, unnatural.
Experiment with angles
Flat lays are always effective in food photography, but playing with angles can add interest. See what a difference it makes below. The bird's eye view looks a little flat, whereas shooting from an angle makes the dish look multi-dimensional (what of course it is!). Re-shooting the flat lay with a slight angle rather than from above makes the toasted pinenuts in the recipe look more 3D.
 |
| Example of a flat lay |
 |
| Experiment with angles |
 |
| The ingredients in this flat lay look a little more 3D as it's not shot directly over head |
Give your food a face lift
Examine your plate and how colourful it is. Is it a fairly beige meal? Or is it all mostly one colour? In food magazines the most captivating recipes we want to try ourselves are colourful and attractive. Greenery always works wonders and can help bring food alive - so top your meal with fresh chopped parsley, chives or your herb of choice. Other options include cheese and chopped chilli - anything that adds colour and interest. Puncture the yolk of your poached egg in a brunch shot for an image that leaves your audience salivating. Wipe up any other spills and add cutlery to give it that ready to eat feel.
Listen to the experts
I am by no means an expert and if you check out my Instagram, I'm sure I have commited a multitude of sins when it comes to food photography. That being said, life is full of lessons and food photography is something that takes time and practice. If you want expert advice on how to improve your work, check out these polaroid style notelets, each depicting a picture of a delicious plate of food and on the reverse side, tips and tricks. Admittedly some of the advice is common sense, but I have learned a lot and I'm really pleased with how some of my recent food shots have turned out.

If you are a budding food blogger or just enjoy taking food photos and want to up your game, check out #TheFoodieBag (also known as the Instagram Bag) here which has everything you need to get started. The kit is just £39.95 including P&P & VAT and contains the following:
- a HUGE tote bag (perfect for lugging your kit around!) with zip fastening and internal mesh dividers and pockets
- A 15-inch 5 in 1 pop up lighting reflector and diffuser
- 4 backdrops (marble, grey concrete, green-grey hybrid and rust-look)
- 8 beautiful postcards with extra tips and tricks for getting the perfect shot
_________________________________________________________________________________________
* This post features #TheFoodieBag from The Cotton Bag Company which was sent to me in exchange for a review. As ever all views (and love of food photography!) are my own.

No comments:
Post a Comment
I am forever grateful for each and every comment I receive, and try my best to reply to them all.
If you leave a comment, I will check out your blog / Twitter and say hi in some capacity
Select "Name/URL" or "anon" from the "comment as" drop-down if you aren't visiting via a blog