Showing posts sorted by relevance for query label:recipe. Sort by date Show all posts

Monday, 4 March 2019

Quick and easy açai berry pancake recipe full of nutrients and antioxidants

* I received a complimentary sample for review purposes but all opinions and love of pancakes are my own!

Our household is a firm believer of "pancakes are for life, not just for Christmas". In other words, we have them most weekends, not just on a dedicated day of the year. Whilst this is great news (hooray for all the pancakes) it can get a little tricky coming up with new ideas for toppings. Maple syrup is always a winner, as is lemon and generous dustings of sugar equal to that of a snow capped mountain. Chocolate is always well received too (although admittedly not so great on the waistline).

Enter Sambazon’s fruity Açai Compote.


WHO YOU ASK?

Sambazon gets its name from its core goal: Sustainable Management of the Brazilian AmazonProceeds from each purchase helps to protect the Amazon rainforest and the families that farm there. Having a Sambazon product so close to Pancake Day was suitably apt as this also falls within Fairtrade Fortnight. Sambazon is currently said to be the only certified organic and Fairtrade Açaí brand in the UK.

I have always been passionate about food, but lately I have been increasingly conscious about where my food comes from and its ecological footprint. I don't know about you, but for me food always tastes that little bit better when you know the farmer / source hasn't had a raw deal.

Enter Sambazon's Açai berry superfruit pack.


WHAT IS AÇAI?

Pronounced "ah-sigh-ee", Açai is a type of berry renowned for its superfood properties. Açai berries grow at the top of palm trees in the Amazon rainforest and each berry contains just 10% of usable fruit and pulp and then a large seed (the latter of which has no benefits) -which gives you an idea of how many berries are needed. Dark purple in colour (similar to a grape), it is full of antioxidants and has a wealth of other health benefits:

  • The pulp and skin contain the most nutrients and are a good source of fibre (great for digestion)
  • Açai berries have similar levels of essential fatty acids as olive oil, of which there are studies linking essential fatty acids to a healthy heart and nervous system. 
  • .... and let's not forget about the antioxidants they contain (anthocyanins) which are also great for a healthy heart
  • Açai berries contain amino acids which are said to help promote muscle performance, production of energy, endurance and strength (excellent news if you're an avid gym goer)
  • Açai berries are said to contain as much vitamin C as blueberries, and also contain vitamins A, B1, B2, B3 and E. They are also a source of calcium, magnesium, zinc and copper.
  • Interestingly they are one of the only fruits on the planet to be naturally sugar free

And with that, let's crack on with how to make some nutritious yet delicious pancakes full of antioxidants and extra goodness.

YOU WILL NEED

  1. A punnet of berries like blueberries or blackberries (I really recommend raspberries for this)
  2. One pack of Sambazon superfruit
  3. Cinnamon (optional)
  4. Ground ginger (optional)
  5. Mint (optional)
  6. Pancake ingredients (whether you go for standard, buckwheat or other, this is up to you!)

METHOD
  1. Cook your pancakes in advance and leave warming in a stack in the oven
  2. Empty one pack of Sambazon superfruit into a pan and add a small handful of berries
  3. Keep on a medium-low heat and keep stirring until the fruit softens and breaks down a little (not too much though as you don't want mush!)
  4. Taste as you go. You can add cinnamon / ground ginger if you wish
  5. Dish up the pancakes and top with the açai berry compote, fresh berries (I used raspberries) and a sprig of fresh mint (optional)

FINAL RESULT


I was really pleased with how my berry compote turned out (and for the record, it was every bit as delicious as it looks!). It barely took any time to rustle up, and really couldn't be any easier.


If you're looking for a pancake topper full of berries and antioxidants, you know where to go. Sambazon products like this one can be found in the freezer aisle of Wholefoods and Ocado (I've also seen on Amazon). Each pack contains four individually sealed bags. Simply keep frozen until needed and once thawed, do not re-freeze. For a full list of stockists, you can find these on the Sambazon website here, or feel free to reach out to the Sambazon team who will be more than happy to help.

Alternatively the Sambazon superfruit packs are also great for smoothies, smoothie bowls and porridge toppers (you can find a full list of recipes here).


How do you like your pancakes?

Tuesday, 11 October 2016

RECIPE // beetroot rosti with avocado

If you had told me when I was little that one day I would be so crazy about avocado that I would even eat it for breakfast, I would have laughed in disbelief. Because avocado is green. And back then I was *quote* allergic *end quote* to anything green. So the very thought of avocado toast would have been ludicrous. But here we are. Here we are in an age where our news feeds are image after image of the green stuff.

But why stop there? If we are going to turn to turn the rules of acceptable breakfast fare upside down, why not go all the way? Which is where ladies and gentlemen, I throw beetroot into the mix.

Full of iron, calcium, vitamin A, vitamin B, and a good source of folic acid, fibre and potassium, beetroot is proven to be good for us. So why is the idea of eating it first thing in the morning unfathomable? No more, my friends.


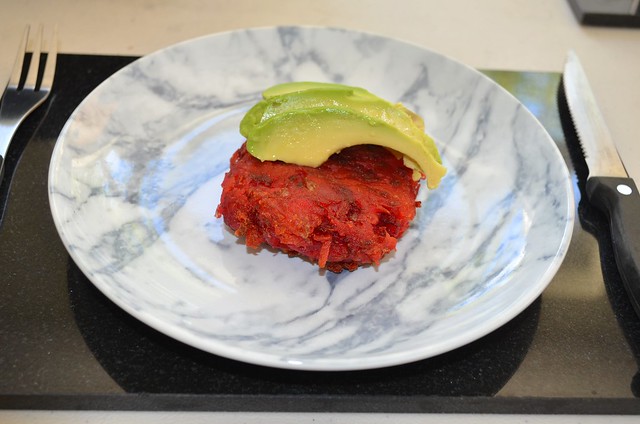
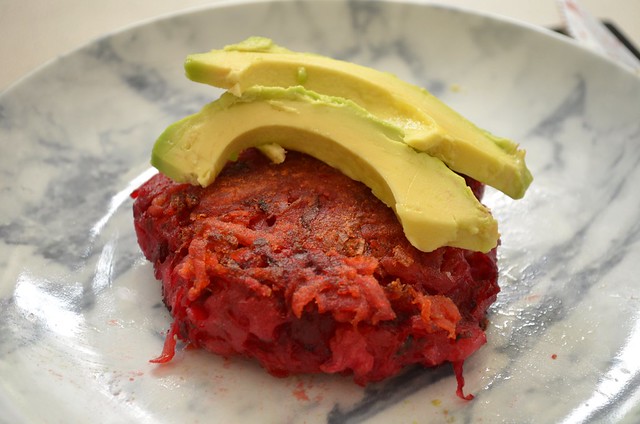
The other morning I made these beetroot rosti's (think of them as classy hash browns, if you will!) and oh my word, why haven't we tried this sooner? Beetroot is good. That is, if you can overlook its messy demeanour.

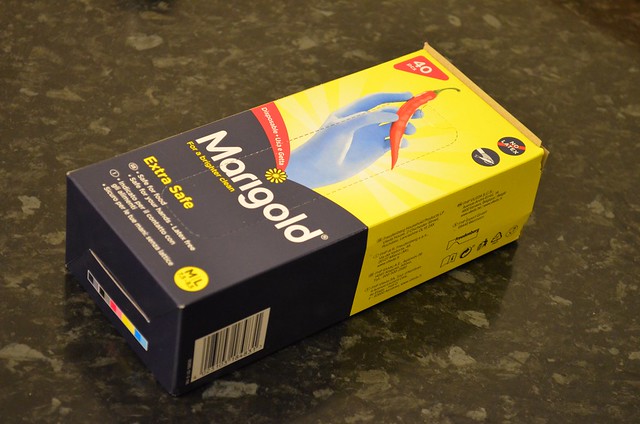
With beetroot forever staining my skin / clothing / crockery / work surfaces, the Marigold Extra Safe Disposable Gloves* I was sent to review were perfect for the job.

But Lucy, there are so many disposable gloves out there, I hear you say. Why these gloves?

Well, the Marigold Extra Safe Disposable Gloves mark the launch of the first ever gloves made with food preparation and handling in mind. With the added benefits of being:

  • 100% latex free - perfect for those with latex allergies
  • Tested to EN standards and having the ECARF label and seal of approval
  • 100% powder free - having tried out the gloves for myself, I can verify I didn't have any sort of powder or grit contaminating my food or any leftover on my hands afterwards. Nor did my hands have that weird plastic glove smell afterwards (win!)

All in all, meaning that your hands have the ultimate protection against smells and stains. Which when you cook with garlic as much as I do, is music to your ears.

For the ultimate test against the trinity of stains, smells and rips, I decided that a beetroot rosti would fit the bill perfectly for the following reasons:

  • Stains - would the gloves protect my hands from the sheer bloodshed you get from opening a pack of beetroot?
  • Smells - would the gloves help with the classic annoyance of having my hands and nails smell of garlic DAYS after I have cooked with the damn thing?
  • Rips - how would the gloves fare against a grater when I grated the potatoes and beetroot?

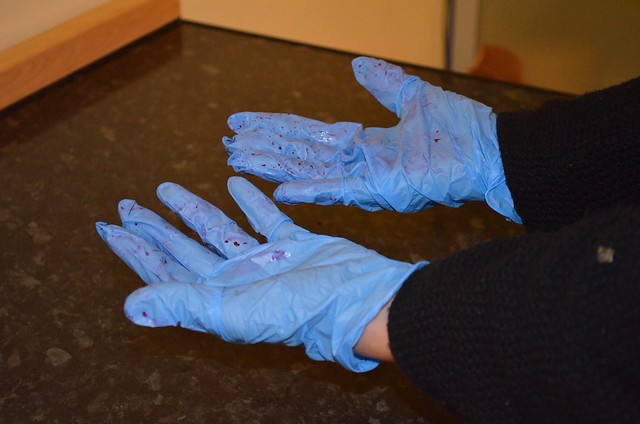
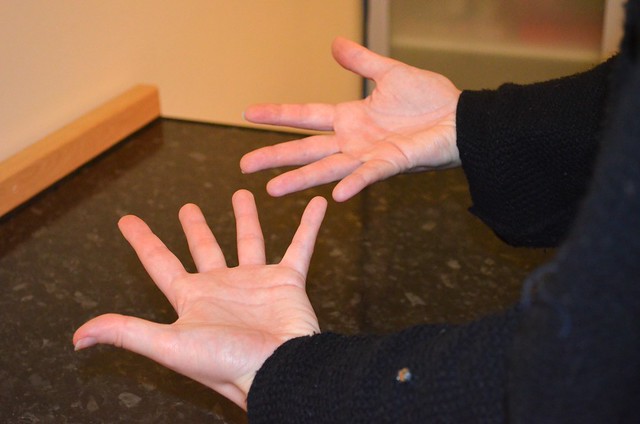
And I must say, I was impressed. I had already hoped that my hands would be stain and smell free - because that's the very least you can ask from gloves like these. However I honestly didn't expect them to survive the grater. Because I wasn't exactly being light handed on the thing. If I wasn't wearing gloves, I probably would have shred my fingers to pieces!


The end result was delicious (the rosti's not the gloves!). I pan fried each rosti for approx 4-6 minutes on each side and then served whilst hot with a generous sprinkling of rock salt to help enhance the crunch of the rosti, and topped with buttery avocado slices. Because beetroot and avocado is a winning flavour combination (go try it if you haven't already!). And what better way to start your day than with a colourful plate staring up at you?


Perfect for breakfast / brunch / lunch, if you want to give this colourful plate a go one day, you can find the full recipe below:

YOU WILL NEED...

  • x4 large Maris Piper potatoes
  • x3 cloves of garlic
  • Pack of x4 ready to eat beetroot
  • Salt and pepper
  • Cooking oil
  • x1 avocado

METHOD

  1. Scrub potatoes to remove any excess dirt. Do not peel as there are so many good nutrients in the skin and it would be a shame to waste them!
  2. Bring a large pan of water to the boil and boil your potatoes for 7-8 minutes on a medium-high heat.
  3. Run your potatoes through a colander and drain. Leave to one side to cool.
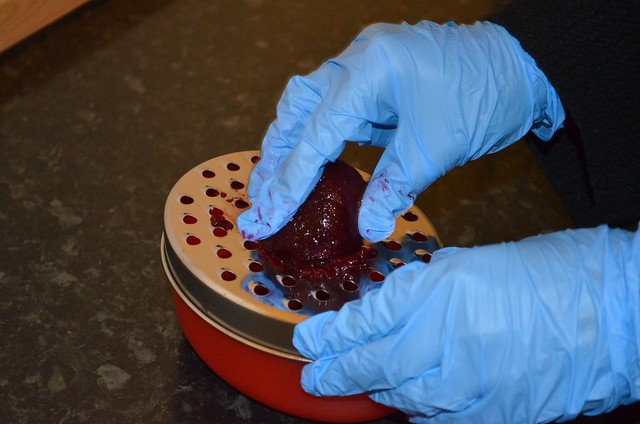
  4. Once cool, grate the potatoes (I use an IKEA grater container as it makes grating so much easier and neater, keeping it all contained in one place)
  5. Transfer your shredded potatoes into a large mixing bowl
  6. Season with salt and pepper and add the crushed garlic
  7. Next grate the beetroot - things will get messy! This is where having the Marigold Extra Safe Disposable Gloves came in really handy, protecting my hands.
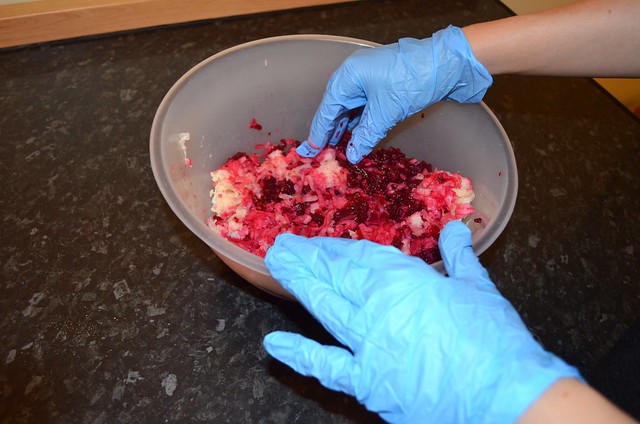
  8. Add the beetroot to the other ingredients in the mixing bowl. Combine and form however many patties you like (I made x8 big ones!). The mixture will very quickly look like super pink burgers!
  9. Oil a frying pan and fry each rosti for 4-6 minutes on each side, or until golden. Dab each one off on kitchen towel once done to mop up the excess oil
  10. Serve whilst hot, adding more seasoning to taste

Makes approx x8 rosti's

Do let me know in the comments below or by reaching out to me on Twitter or Instagram (I'm @Lucy_Angele on both!) if you give this recipe a try! It's something a little bit different from avocado toast, but is every bit as tasty!


* Post sponsored by Marigold

Wednesday, 12 September 2018

Is it a salad? Is it a stew? Your guess is as good as mine!

I don't know about you, but on chilly autumnal days and wintry evenings, all I want to eat is bread dunked into thick soups and stews. I'm talking ultimate comfort food.

A firm favourite of mine is lentils. Whether in a spiced dhal, or adding extra substance to a soup or a potato topped pie, you can't go far wrong. Great in both meat and vegetarian dishes, lentils are low fat and full of nutrients. I use red lentils in veggie lentil ragu and I find puy lentils are great in hearty stews.

I'm not altogether sure how to classify the below recipe. Is is a warm salad? Is it a stew? You decide. All I know is that it's damn tasty whatever it is.


You will need...

INGREDIENTS
  • 1 red pepper, sliced into thin strips
  • 2 tbsp balsamic vinegar (I actually used more)
  • 1 tbsp English mustard
  • 250g pouch of easy cook puy lentils (I used Merchant Gourmet puy lentils)
  • 2 rosemary sprigs
  • Fresh parsley (optional)
  • Dried thyme (I was liberal with these)
  • Wild & Game pheasant & pear sausages

METHOD

1. Set your oven to 190°C / Fan 170°C / Gas 5 and cook the sausages in the centre of a pre-heated oven for 25-30 minutes, turning mid-way through.


2. Meanwhile fry the chopped red pepper until soft (I like mine slightly charred for extra flavour!)

3. Add the balsamic vinegar, mustard, fresh parsley, rosemary and thyme, and stir to combine


4. Add the lentils. As they are ready cooked, you will only need to warm these


5. As soon as the sausages are fully cooked, remove from the oven, slice them, and add them to the pan as well


7. Season to taste and add more herbs, balsamic etc according to your taste (I added extra balsamic and extra thyme)

8. Serve with a sliced French baguette. Or salad. Or both.


If you thought my other sausage stew recipe was simple, then you're in luck.. the above recipe is even easier to rustle up! Pop the sausages into the oven and once they are cooked, the rest of the meal hardly takes any time at all. To be honest it takes more thyme than time (sorry!)

I really liked the venison sausages I talked about here, but I actually loved the pheasant & pear ones used in today's recipe even more. They were different to other sausages I have tried before as they didn't taste of either beef or pork and were more like chicken or turkey, and leaner. I was nervous that the fruit (pear) would come through fairly strongly, but luckily it was only subtle.

And if you're veggie, you can always sub out the sausages for veggie ones.

It's a fairly budget friendly recipe as lots of the ingredients are staples you may already have in your food cupboard. But to make it even cheaper, use dried lentils instead of ready cooked ones and cook according to the packet instructions. Ready cooked lentils are great for if you are short on time and want a quick meal, but are not the cheapest option (to be honest, I don't buy them often and usually wait until they are on special offer!)

I would say this recipe serves two people but it depends on your appetite (M. and I tend to have larger lunches and smaller dinners so this did us for x2 meals each).

The herb, balsamic and mustard concoction is designed to be like a light salad dressing rather than a sauce so I accompanied mine with salad. However I haven't listed salad in the ingredients above as for me personally I didn't find that the salad worked with the dish at all. The leaves and lentils were both quite 'earthy', so instead I suggest accompanying with a sliced French baguette to add a different texture to the dish. Plus bread is structurally sound for scooping up that lentil goodness (not quite as effective with a lettuce leaf!)

And don't feel obliged to add fresh parsley. I added it to mine and it didn't really add anything. Thyme and rosemary allow for much deeper flavours and complement the sausages better.

* Wild & Game sausages kindly sent for review purposes. As ever, all words and opinions are my own

Monday, 23 March 2015

Recipe // Chicken and mushroom soup

Remember my seafood and miso soup? It was an experiment, but a very tasty experiment which paid off. Since then, I've adapted my recipe a little to allow for a different flavour combination - chicken and mushroom. So if you're kosher or can't stand seafood, this may be the one for you! This time around I didn't add rice noodles as being a complete idiot, I forgot to buy them(!) ...but this recipe works equally well without the noodles and is ideal if you're following a no carb / low carb diet. However if like me, you love your carbs, you can find noodle quantities via my previous recipe [same link as above].

You will need...

  • x2 tablespoons of white miso paste
  • 1 litre of water / vegetable stock / chicken stock
  • 150g of mushrooms (I used shiitake mushrooms)
  • x3 pak choi
  • x2 chicken breasts
  • 1 or 2 spring onions

Method

1. Wash and chop the mushrooms and pak choi. I cut the pak choi in half lengthways and kept the mushrooms fairly large as both will reduce anyway once you start to cook. Chop the chicken into small pieces / strips.

2. Shallow fry the spring onions and chicken until the chicken is cooked. Gradually add the mushrooms and pak choi.

3. In a separate bowl, mix together the white miso paste and water. You can add vegetable stock or chicken stock instead of water if you prefer - however I found the soup nice enough without stock. Add to rest of the ingredients in the pan.

4. Slowly bring to the boil. Once boiled, continue to simmer. You can add vegetable and chicken stock if you wish, but when I tasted mine, it had plenty of flavour already. Simmer for 5 minutes and then serve.


 Serves 2 people

Light, healthy and very quick to rustle up, it's the perfect soup to come home to after a long day at work. The chicken can easily be substituted for tofu too if you're veggie! If you decide to give this a try, make sure you Tweet me @Lucy_Angele using the hashtag #cookwithlucy or leave me a comment below because as ever, I'd love to see your creations!

Wednesday, 3 April 2013

I cook with wine. Sometimes I even add it to the food.

No matter what the holiday, I always use it as the perfect excuse to spend more time in the kitchen and make more of an effort with meals. After work it’s all too easy to reach for a takeaway or grab a pizza because after being confined to a desk for most of the day, who wants to spend hours on end prepping dinner?!

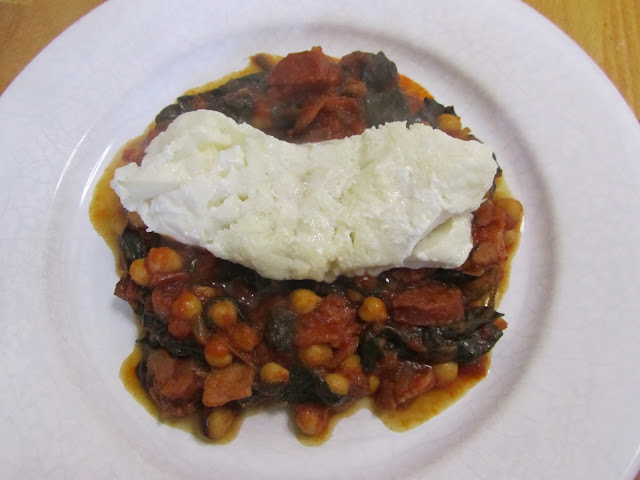
I dug out a recipe I'd been dying to try for ages. A Spanish style stew - chorizo, chickpeas, spinach, red wine and tomatoes – topped with a piece of fish


Waiting for food to cook is a thirsty affair:


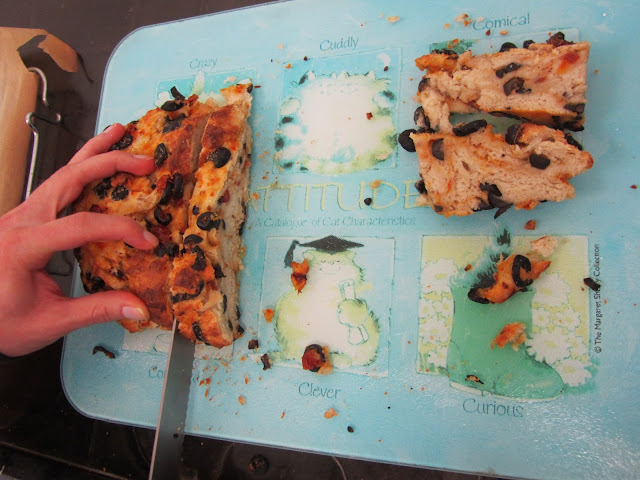
Instead of buying a baguette, I made my own bread from scratch. Stuffed with numerous sun-dried tomatoes and black olives, the dough barely held together. There may have been some swearing at this point...


Thankfully it didn’t fall apart in the oven, and the end result was pretty damn tasty:


Bitten by the bread bug, the next day I made bread rolls stuffed with chorizo. 
Think of them as like a pizza stuffed crust... but in miniature form


I gave slutty brownies a go


For those of you who are in the dark about slutty brownies, these are brownies AND cookie dough combined into what I can only call a MIRACLE. Best served warm for a gooey centre. You can use basic brownie and cookie recipes for this. Or you can be lazy like me and buy a mix... thanks Asda!


The chicken stuffed with parsley garlic butter and black olives was a fiddly affair. It was meant to be like a swiss roll but the chicken I bought was bordering on morbidly obese and was too fat to roll out. Even after I beat the hell of it with a rolling pin, it remained stubborn. Instead I improvised and made chicken parcels:


The end result was delicious:


And I like to think some of it looked like a swiss roll (ish)

Stay tuned for more recipes and more food based content!

You can find me on bloglovin' here 

Monday, 2 October 2017

The autumn soup and bread recipes you KNEAD to have in your life // bread making class at the Jamie Oliver Cookery school

The other weekend I headed to Westfield in London for a bread making class at the 
Jamie Oliver Cookery School. But did I rise to the occasion? Read on to find out!


Before we started we were shown the kitchens we would be working in and noticed that the Jamie Oliver Cookery School kitchens were all fitted with Hotpoint ovens. A rep from Hotpoint spoke to us before our session and said that through customer research they identified that the one thing people find most frustrating with their ovens is a non-even bake. I for one know how annoying it is when a bake is burnt on top but also has a soggy bottom! People tend to blame themselves for a bad bake, however it's more likely the oven. Did you know that ovens' temperatures can vary up to 15 degrees? And this alone makes it all too easy to produce uneven bakes. Hotpoint’s new ovens offer Multi-Flow technology to regulate the temperature and to ensure better heat distribution and a good even bake every time.


Our bread making class was led by chef Gabby who gave us a demonstration of what we kneaded (ha!) to be doing that day. She taught us the signs of a good prove and how to work the dough so you get those perfect spider web like strands.


Fun fact: if you over work your dough or don't get the prove you were after, all is not lost. Bread dough is always salvageable. For example it can make a great pizza base

We were told we would be making bread rolls in different shapes to have with fondue and soup at lunch and also two focaccias. I did wonder how on earth we were going to make all those in the space of a few hours. I make bread at home and I know how long it can take to prove the dough. Luckily for us, the hard work taken out of bread making as Gabby had proved lots of dough in advance. That being said, we also made one dough ourselves which were able to take home with us. Mine proved very well on the Central Line. When I got home, the dough had essentially eaten the box and was making a break for it. I baked mine at home using fresh rosemary from the garden (because you can't beat rosemary focaccia!)

After our bread making 101, we were led away to individual work stations with the ingredients all pre-measured for us, which made things nice and simple regardless of if you were a seasoned pro baker or completely new to it all. It felt very Bake Off. But without the cameras and the pressure.

To make a dough all you knead (sorry!) is flour, water and yeast. At home I use dried yeast, however at the class we used live yeast. I had never seen it before in this form. It came as large blocks and smelt fragrant.

With the initial demonstration, it was a lot to take in at once. I wasn't sure how I was going to remember it all, but Gabby and her lovely sous chef were on hand, advising us when our doughs were done or if they kneaded (ha!) more work. Baking alongside other bloggers, there was a great sense of solidarity as we were all in it together. There were plenty of doh! moments when your mixture stuck to the table top because you hadn't floured it enough, and when you get more flour down you than on the table...

Rollin' with it

For our bread rolls, the dough was well proved and elastic (a good sign!), which made them quite difficult to shape as no sooner had you rolled out a shape, would it retract back. We were advised to use a knife with a little olive oil on the blade while making cuts to the dough (such as the score marks on top of the baguette) to make the dough easier to work with. One of the shapes we were shown was an Epi, but my dough wasn't having it (huge respect to anyone else who managed it!), so instead I made a spiral snail sort of shape. Which for the record, didn't look anything like the Bake Off "snail".  I also made a simple round roll, a baguette and a plaited loaf. The latter of which lost its definition when baked. Mine were egg washed to give them a golden colour and a sheen once baked. But we were advised that you could also use milk instead if you wanted more of a matte effect. If you are lactose intolerant, milk can be switched out for soy milk or other alternatives.


If you want to give these a go yourself, you can find the recipe below:

______________________________________________________________________________

Basic bread dough

Ingredients 
  • 1kg strong flour, or wholemeal strong flour
  • 30g fresh yeast
  • Water!

Method
  1. Making a well - Put the flour in a bowl and make a large well in the centre. Pour around 310ml of tepid water into the well, then add the yeast, 1 level teaspoon of salt and stir with a fork.
  2. Getting it together - Slowly bring in the flour from the inside of the well, being careful not to break the walls of the well. Continue to bring the flour into the centre until you get a stodgy consistency - then add another 310ml of tepid water. Continue to mix until it's stodgy again, then bring in all the flour, making the mix less sticky. With floured hands bring it together into a ball of dough.
  3. Kneading - Knead on a flour dusted surface for 4-5 minutes until you have a silky and elastic dough.
  4. First prove - Flour the top of the dough and place in a bowl, cover with clingfilm and allow it to prove for about half an hour until doubled in size in a warm, moist, draught-free place.
  5. Second prove, flavouring and shaping - Once the dough has doubled in size, knock the air out for 30 seconds by bashing it and squashing it. Shape it or flavour it as required - folded, filled, tray baked - and leave it to prove a second time for 30 minutes to an hour until it has doubled in size once more.
  6. Cooking your bread - Pre-heat the oven to 200 degrees Celsius / 410 degrees Fahrenheit / gas 6. Gently place your dough onto a flour-dusted baking tray and into the pre-heated oven. Bake for 25-30 minutes or until cooked and golden brown. You can tell if it's cooked by tapping the base - if it sounds hollow, it's done. If it doesn't then pop it back in for a little longer. Once cooked, place on a rack and allow it to cool for at least 30 minutes. 

Makes a loaf - or in our case 4 rolls!

______________________________________________________________________________


We used an assortment of poppy seeds, pumpkin seeds and sunflower seeds for extra crunch. And what better topping to have with autumnal soup than pumpkin seeds?!

Focaccia gonna do?

The focaccia dough was a good work out. It was great to work out the week's stress and it felt very therapeutic.

We crushed the salt with rosemary to create rosemary salt, but also left some sprigs of the rosemary large. I love crunchy rosemary on my bakes. The kitchen smelt amazing during this time. There is no better smell that the smell of freshly baked bread and rosemary.


Focaccia is one of my favorite types of bread - especially when dipped in balsamic vinegar and extra virgin olive oil.  For years my go to starter at Jamie's Italian has always been their selection of breads and oils. If you would like to try making your own focaccia, you can find the recipe for this below:

______________________________________________________________________________

Rosemary focaccia

Ingredients

  • 240g Italian tipo "OO" flour
  • Extra virgin olive oil
  • 10g fresh yeast
  • 1 sprig of rosemary

Method

  1. Combine the flour. yeast, 145ml of tepid water, 30ml of extra virgin olive oil, yeast and a good pinch of sea salt in a mixing bowl and knead gently for for 5-10 minutes until smooth.
  2. Cover the mixing bowl and leave to rest in a warm place for 45 minutes, or until the dough has doubled in size.
  3. While the dough is rising, prepare a baking tray by lightly oiling the base and sides with vegetable oil.
  4. Transfer the dough to the baking tray. Spread out evenly using the palm of your hands and gently expel the air from the dough, then rub 15ml of extra virgin olive oil over the surface of the dough using your finger tips.
  5. 'Dimple' the dough ensuring that you don't press all the way through to the base. Rip up your rosemary and poke them gently into the bread.
  6. Cover the dough again and leave to rest for a further 20-40 minutes, or until it has doubled in size.
  7. Pre-heat the oven to 200 degrees Celsius / 410 degrees Fahrenheit / gas 6.
  8. Place the baking tray in the pre-heated oven for 15-20 minutes, or until golden brown. Once cooked, carefully remove from the oven and drizzle with a little more extra virgin olive oil. Serve warm or cold.

______________________________________________________________________________

Whilst the focaccia was baking, we settled down for lunch with our bread roll creations. Naturally, the bread had baked perfectly - thanks Hotpoint! Our bread rolls were still warm and paired with fondue, a comforting bowl of soup each and red wine, we felt very toasty and autumnal (and sleepy!).


No doubt about it, I will be re-creating this soup at home. Hand on heart, it was one of the best soups I have ever had. If like me, you would like to try making this soup yourself, please find the recipe to this below:

______________________________________________________________________________

Roasted pumpkin soup

Ingredients

  • 2kg pumpkin or squash
  • 5 cloves of garlic
  • 4 sprigs of fresh thyme
  • 2 carrots
  • 2 sticks of celery
  • 2 red onions
  • 2 chicken or vegetable stock cubes
  • 2 tablespoons crème fraîche
  • Extra virgin olive oil

Method

  1. Pre-heat the oven to 170 degrees Celsius / 325 degrees Farenheit / gas 3.
  2. De-seed the pumpkin or squash, then chop into wedges.
  3. Place the wedges on a large baking tray and lightly drizzle with olive oil.
  4. Gently squash the garlic cloves in their skins and scatter across the baking tray with the thyme leaves. Season with sea salt and black pepper.
  5. Roast for 1 hour, or until caramelised at the edges.
  6. Meanwhile, peel and roughly slice the carrots, chop the celery, and peel and roughly chop the onions.
  7. Drizzle 2 tablespoons of olive oil into a large pan over a medium heat, add all the prepared ingredients, then cook with the lid ajar for 30 minutes, or until softened.
  8. Crumble the stock cubes into a jug, cover with 1.5 litres of boiling water, and stir until dissolved.
  9. Once cooked, add the pumpkin or squash to the pan and pour over the stock. Squeeze the garlic out of its skin and add to the pan.
  10. Bring to a simmer for a couple of minutes until hot through, then remove from the heat.
  11. Using a handheld blender, carefully blend the soup until smooth. Season to taste.
  12. Divide between bowls, add a dollop of crème fraîche and extra virgin olive oil to each. You can top with thinly chopped red chilli if you like.  

Serves 4

______________________________________________________________________________

We each left with a Currys PC World goody bag filled with items to continue that autumn feeling. You can't get more autumnal than candles and tea. This candle for the record smells out of this world!


In summary, I really enjoyed my first Jamie Oliver Cookery class. The main thing I took away from my experience is that it can be really easy (and satisfying!) to make your own bread and it really doesn’t take that long. The chefs there were so energetic and passionate, and were a pleasure to work with. The Bread Baking: Knead to Know class is priced at £65 per person and they do plenty of other classes too where you can learn to prepare sushi, fish, pasta, curries and so on. You can view their full range of classes here where it details times and the number of slots available on a given date.

Thank you so much to Currys PC World, Hotpoint and The Jamie Oliver Cookery School for putting on a wonderful #AutumnalBakes event. I feel really inspired to get back into baking bread. Because crust me, I'm on a roll.


#AutumnalBakes

I was offered a complimentary cookery class but all opinions my own